
What is a lift-turn drain stopper?
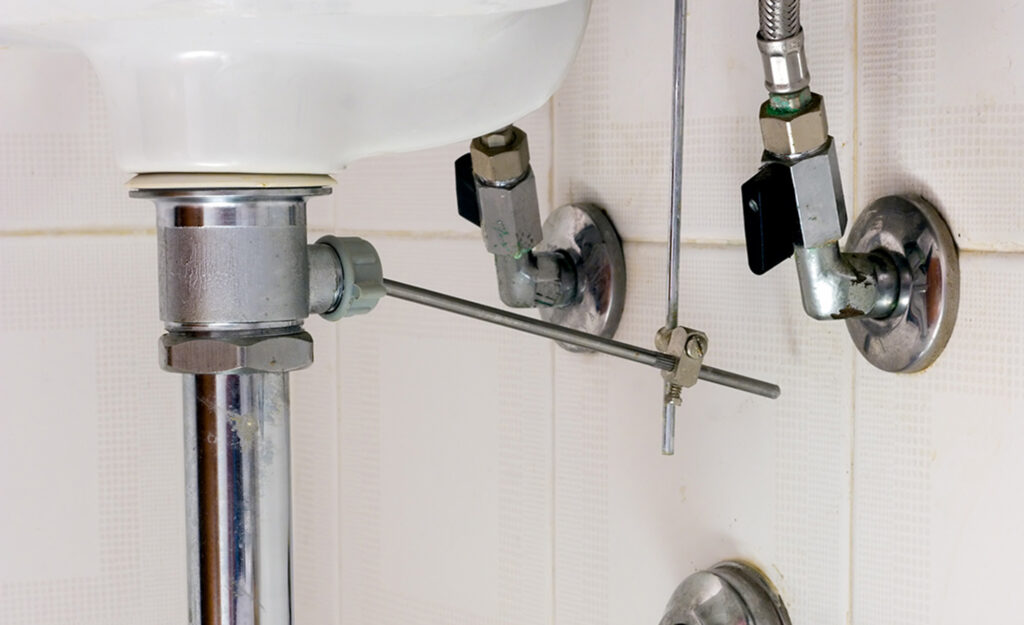
This drain stopper has a little handle on the cap that you can twist to open and close the drain. The cork goes down and seals as you turn it a single way, and it lifts and opens. This channel plug has a middle set screw that winds into a thread drain crossbar. The set screw sits underneath the plug top cap. It can be difficult to remove if it is overtightened or left unopened for some time.
Lift-and-Turn Stoppers Working
Lift-and-turn plugs open and close through a bending movement with the hand. While shutting, a pin in the cork aligns with the notch in the channel. The plug then drops into place inside the drain. It locks, holding the cork set up when it turns more.
These corks deliver when turned by hand in the opposite direction. They tend not to be spring-stacked. However, pop back into the open position once the pin of the plug becomes unaligned with the channel’s notch.
Installation
You can install the cork with a middle set screw, and it won’t take you over a few minutes. Yet, removing it is trickier; pretentious, and you screw it too close during installation. Because of its simple mechanical plan, it rarely breakdowns. It is gaining entrance to the channel to clean it. Unblock it and clear the trash because the Setscrew unscrews from the thread.
Discerning homeowners recognize that their chosen fixtures speak volumes about their appreciation for quality and craftsmanship. Among such fixtures, the lift-turn drain stopper blends form and function. Let’s journey into the meticulous installation of this exceptional piece.
Understanding the Lift-Turn Drain Stopper’s Superiority:
While the market offers a plethora of drain stoppers, the lift-turn variant is in a league of its own. Its twist mechanism seamlessly seals and releases water, signifies both sophistication and practicality, making it the go-to choice for those with an eye for luxury.
Step-by-Step Premium Installation Guide:
Begin with Perfection: Start with a debris-free drain hole. This ensures that the stopper’s installation is seamless and its performance unhindered.
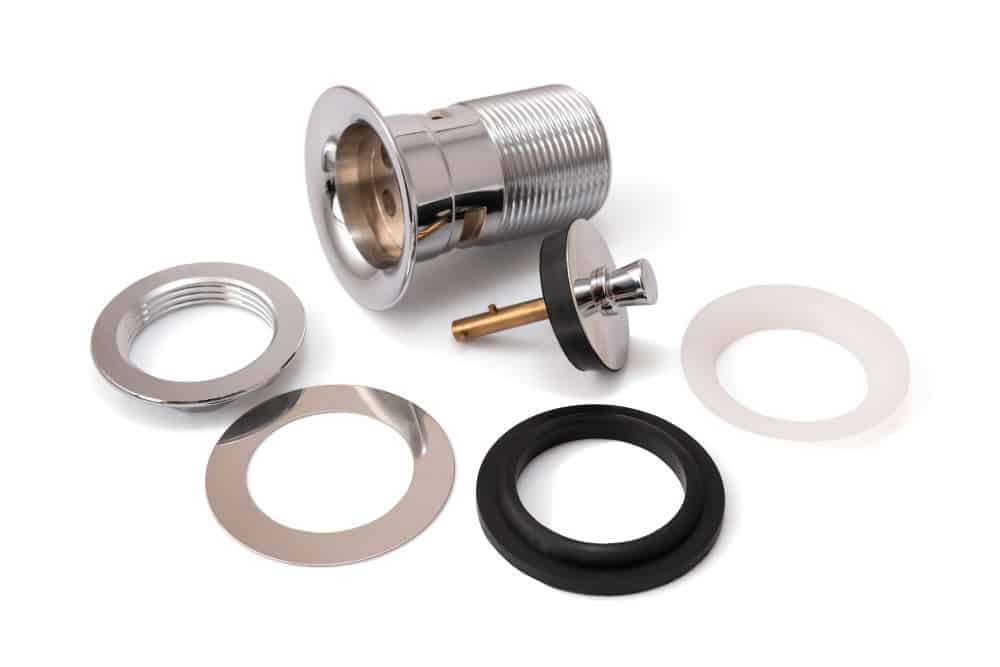
Inspect with Intent: Before installation, take a moment to admire the craftsmanship of the lift-turn stopper, ensuring all parts are in prime condition.
Seal It Right: Apply a bead of plumber’s putty or silicone sealant around the stopper flange, guaranteeing a watertight seal. This step is crucial to ensure longevity and optimal functionality.
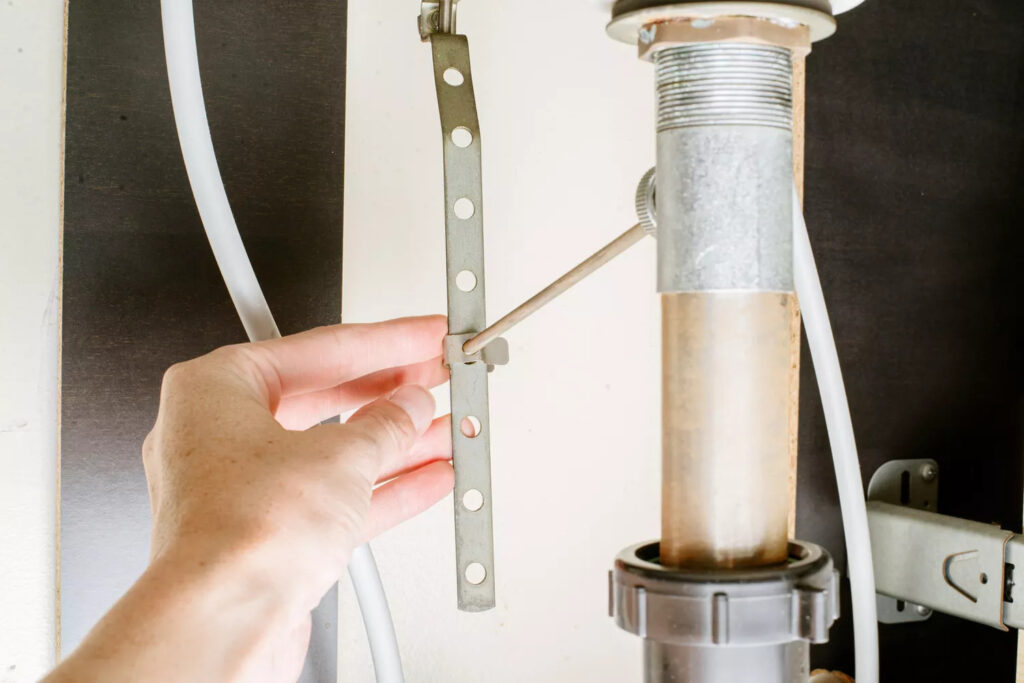
Precision in Assembly: Carefully insert the lift-turn rod. Beneath the sink, connect it to the pivot nut, ensuring a smooth operation. Secure the connection with the set screw on the stopper’s side.
Validation Test: Close the stopper and fill the sink with water. A premium product promises no leaks. Ensure the base is watertight, and then test the drainage.
Guide to Replace a Lift and Turn Bathtub Drain
The lift and turn channel does what its name surmises. You lift and turn the plug to open the drain and turn it in the opposite direction to close it. However, the lift and turn bath channel cork have fewer mechanical parts than the bath channels.
Like a trip lever plunger stopper, it can sustain damage and become worn over time. When crack and wear happen, the bath will never again hold water. We need you to replace the lift and turn the channel.
Step-1
Grab the handle on top of the channel cork. Pull up the channel fitting and turn it until it stays in the open or drains position. Check out the edge of the handle for a set screw. If the knob has a set screw, use a hex key or trim level head screwdriver to diminish the set screw. On the other hand, if your knob doesn’t have the set screw, turn the handle counterclockwise to stop it. It can be done by exposing the brass insert underneath the handle.
Step 2
Remove the brass insert by turning it counterclockwise with a level-head screwdriver. Lift the drain cork from the drain body.
Step 3
Insert the end of tongue-and-groove plier handles into the opening in the lower part of the channel body. Thread the metal shaft of a rock-solid screwdriver between the pliers’ handles.
Step 4
Grab the closures of the Screwdriver with your hands. Use it as leverage to curve the channel body counterclockwise. Lift the first channel body from the bath and pull the first gasket from the bath channel opening.
Step 5
Insert another tub channel gasket into the tub channel opening. Carry out a dainty rope of handyman’s putty about the thickness of a drinking straw. Long enough to fold over the replacement lift and turn the drain body.
Step 6
Wrap the putty rope around the new channel body, putting it against the underside of the channel lip. Implant the new channel body into the tub channel opening—Hand-tight the drain body by turning it clockwise.
Step 7
Embed the finishes of tongue-and-groove plier handles into the opening in the new channel body. Use the heavy-duty Screwdriver to turn the channel body; pliers clockwise until tight. Clear enough handyman’s clay that slimes underneath the new channel body with an old cloth.
Step 8
Drop the new plug into the replacement drain body. Embed the new brass insert into the center of the pin and fix it clockwise with a level-head screwdriver. Screw the handle clockwise onto the brass insert.
Pros and Cons of Lift and Turn Tub Drain Stopper
Pros
- Simple to clean due to a simple setscrew connection.
- Easy to introduce, would it be suitable to purchase a replacement
- Simple design implies it rarely glitches.
Cons
- Setscrew is tricky to remove for repairs.
- Probability of overtightening, which damages the setscrew thread.
Inspect and Clean lift turn drain stopper
Why Regular Maintenance Matters:
Longevity and Durability: Every valuable object thrives with some attention. Regular maintenance guarantees your drain stopper continues to operate flawlessly, safeguarding against daily wear and tear rigors. When treated right, these fixtures can last a lifetime, serving as a testament to their exceptional craftsmanship.
Preserving the Aesthetic: The shimmering surface of a well-maintained drain stopper speaks volumes about a homeowner’s attention to detail. Over time, neglect can lead to dullness, tarnish, and mineral build-ups, undermining the fixture’s luxury appeal.
Ensuring Peak Functionality: The lift-turn mechanism is engineered for smooth operation. Regular checks and cleaning ensure that every twist and seal remains as efficient as day one, preventing potential drainage issues.
Essential Tools for Inspection and Cleaning:
Soft Bristle Brush: This humble tool is a champion for gently scrubbing away grime, ensuring no scratches mar the surface of your premium fixture.
Neutral Dish Soap: For a gentle yet effective cleanse. Harsher chemicals can damage the finish, so sticking to mild cleaning agents ensures cleanliness and protection.
White Vinegar: Your eco-friendly weapon against stubborn mineral deposits. Unlike commercial cleaners, vinegar is gentle on finishes and tough on build-ups.
Quality Lint-Free Cloth: This cloth ensures no watermarks or lint are left behind for a gleaming finish.
The Detailed Cleaning Process:
Initiate with a Preliminary Rinse: Use lukewarm water to wash away any surface dirt or residues gently. This pre-cleaning step prepares the stopper for a thorough cleanse.
Gentle Scrubbing: Mix some dish soap in a bowl of water. Dip your soft bristle brush into the solution and gently scrub every part of the drain stopper. Pay attention to the areas where the stopper interfaces with the sink, as residues often accumulate here.
Combatting Mineral Deposits: Fear not if your stopper shows signs of mineral deposits. Soak a section of your lint-free cloth in white vinegar and wrap it around the affected areas. Let this sit for about an hour. The acidic nature of vinegar works to dissolve these stubborn deposits. After the soak, use your brush to scrub the area, ensuring a clean surface gently.
Rinse and Dry: Give the stopper a good rinse with clean water once cleaned. It’s essential to remove all soap and vinegar residues. Use the lint-free cloth to dry it, ensuring a sparkling finish without watermarks.
Deep Dive: Inspecting the Mechanism:
Unscrewing and Examination: Occasionally, it’s a good idea to unscrew the drain stopper for a deeper inspection. This gives you access to its underside and the immediate drain area, often a hotspot for hidden debris or hair. A quick check can prevent potential blockages or drainage issues.
Cleaning the Mechanism: With the stopper removed, take the opportunity to give it and the exposed drain area a thorough cleaning. This ensures smooth operation and prevents any unwanted odors or slow drainage issues.
Reassembly: After the deep clean, securely screw the stopper back in place. It should move smoothly, sealing and releasing water with ease.
Pro Tips for Prolonged Shine and Functionality:
Monthly Rituals: Incorporate a monthly check into your routine. Quick inspections can detect issues before they escalate, saving time and potential repair costs.
Stay Natural: Avoid the allure of commercial drain cleaners. These can often be too harsh for premium fixtures, leading to irreversible damage.
Soft Water for the Win: Hard water can be the culprit behind frequent mineral deposits. Consider investing in a water softener. It benefits not just your drain stopper but all your fixtures, preserving their shine and functionality.
Conclusion:
Your lift-turn drain stopper, a symbol of luxury and craftsmanship, deserves the best care. Regular maintenance ensures it remains a centerpiece in your bathroom, reflecting its innate beauty and your commitment to quality. Through this guide, embrace the art of maintaining this exquisite fixture, ensuring it graces your home for years.