Whether you want to install a new siphon P-Trap or replace the old one, you need a proper guideline. You have come to the right place because it is the most detailed and useful P-Trap installation guide on the internet. Just follow the steps carefully, and you will be able to install the P-trap under the basin fully.
Know the P-Trap First
Generally, you can install the trap in the basin by following our guide. But if you know about it before you start the installation process, you can do it professionally. So, here is some preliminary discussion about the P-Trap.
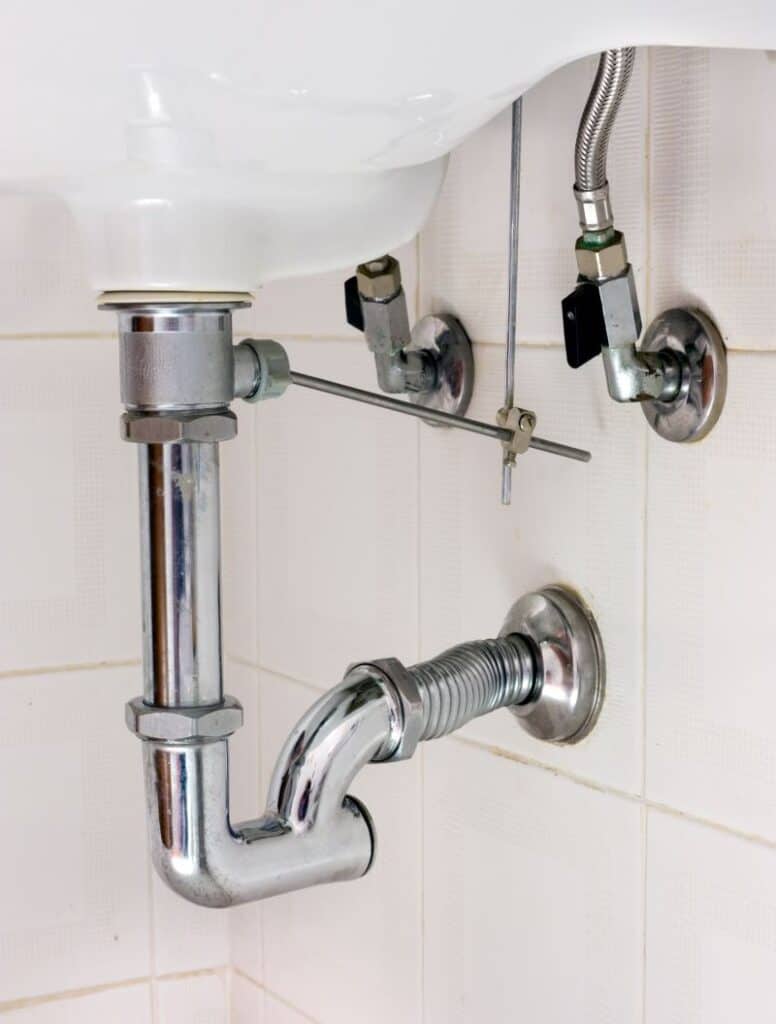
The p-trap is a bent pipe used to drain the wastewater from the basin or sinks into the main drain. It also prevents sewage odors and unwanted backflows in your basin.
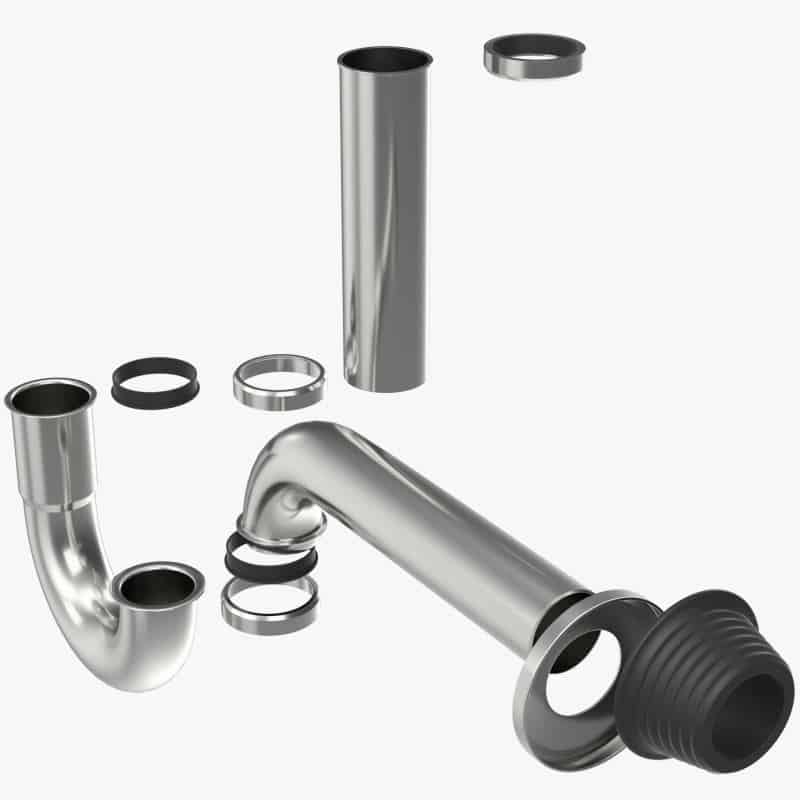
The shape of a p-trap looks exactly like the letter “P.” You may be considering it as one pipe, but it is not. This is the result of joining three separate pipes. However, sometimes you will get only two joining pipes, and you will need to buy the third pipe separately.
Assuming your trap has all the components. So, there is a curvy-head pipe (J-shaped Trap arm), an incomplete U pipe (Trap Bend), and a straight pipe (Tailpiece). And two joints connect the trap arm on one side of the trap bend and the tailpiece on the other side. You will find a nut and a rubber washer in both joints.
In addition, the p-trap has two ends. Consider the tailpiece end as the inlet and the trap arm end as the outlet. The inlet connects to the basin, and the outlet meets the drainpipe in the wall. Also, there is a nut in the inlet and a nut or cover in the outlet to secure the end joints.
This is all you should know about the p-trap before you start installing it. You can read our post “functions of a siphon p-trap” for more details. Above all, you are now ready to begin the installation.
Tools You Need To Proceed
Keep the below equipment at your fingertips before starting the installation.
· The P-Trap
· Pliers or Adjustable Spanner
· Hand Saw
· A Pencil
P-Trap Installation Guide
Here are the detailed steps for installing the P-trap under the basin. Make sure to follow the steps carefully and sequentially.
Step 1: Make Access underneath the Basin
You will need easy access under your basin or sink to do the setup comfortably; if there is anything in there, keep them aside. Also, sometimes it is dark under the sinking cabinet. Torchlight or the flashlight of your mobile can help you there.
Step 2: Take Off the Old Trap (If You Are Replacing)
This step is only for those who are replacing the old p-trap. And the rest steps are for everyone.
You have to remove the old trap to replace it with a new one. To do that, firstly, turn off your basin’s water supply. After that, use your pliers to loosen the stubborn nuts of the inlet and the outlet. Now you can unscrew the nuts with your hands. Next, unscrew them completely and remove the trap from the assembly by pulling out the trap arm and the tailpiece. Sometimes, it is possible to wastewater coming out while removing the trap. So, use a bucket under the trap when removing it… to catch the wastewater before spreading out.
Step 3: Test Fit the New P-Trap
Now hold your new p-trap near the assembly to take the measurements. To clarify, hold the trap inlet close to the basin waste hole and the outlet to the wall pipe. Just the way it will be installed. After that, determine if it fits well with the assembly or if any tube needs to be cut.
You can mark the tailpiece and the trap arm with the pencil for the extra pipe. However, be sure to keep the trap arm at least 1 inch larger at the outlet edge. This is because that end will go inside the wall pipe. Finally, cut the pipes (if necessary) with the hand saw into your marks.
Important note: When cutting the trap arm, cut it from the outlet end. Do not cut its bend head. And when cutting the tailpiece, cut its opposite edge, not the inlet end.
Step 4: Disassemble the Trap
Disassembling the p-trap before installing will give you more flexibility. So, loosen all its joints to separate all the parts. Therefore, now you got a straight pipe that is the tailpiece, a trap bend, a curvy-head trap arm with two nuts, and an extra nut with a washer.
Step 5: Attach the Tailpiece to the Basin
It is time to connect the tailpiece with the basin waste hole. Hopefully, there is a nut with the basin waste hole. Unscrew it from there and then insert it into the tailpiece pipe from the opposite end of its inlet edge. Make sure that the nut spins faces the inlet after inserting.
Now hold the tailpiece inlet close to the basin waste and attach it by screwing the nut with the basin waste threads. Further, put the extra washer followed by the nut at the tailpiece bottom and leave it as it is for now.
Step 6: Attach the Trap Arm to the Wall Pipe
Insert the outlet edge of the trap arm inside the wall pipe. Make sure its curvy head is pointing downwards. After that, screw up the outlet nut with the wall pipe. There is one nut left with the trap arm; move that nut to another end.
Step 7: Connect the Trap Bend
Now you have to complete the assembly by joining the trap bend with these two pipes. The short leg of the trap bend will join the trap arm, and the long leg will meet the tailpiece. Following this method, attach the trap bend using the nuts. Finally, tighten the nut joints with your pliers or spanner. But do not over-tighten the nuts; it will cause cracks in the pipes.
Step 8: Test It and Check For Leaks
Above all, you can now turn on the water supply to test the p-trap. First, open the faucet and let the water run through the trap. Meanwhile, keep an eye on the trap and check for joint leaks. If there is any, tighten the nut gently with the pliers until the leakage stops.
If the trap is working fine, you have successfully installed the p-trap under the basin. And you did it without calling a plumber. However, everything is easy when you have the proper guideline. For more plumbing DIYs like this, you can follow our blog.