
Water pressure benefits
Do you ever have problems with low water pressure in your kitchen faucet? It can be frustrating when you’re trying to cook or wash dishes, and the water doesn’t flow well.
We’ll discuss why kitchen faucets have low water pressure in this blog post and various fixes. So read on to learn more!
Why is the water pressure so low in my kitchen sink?
There are several causes of the kitchen sink’s low water pressure. One potential cause is a problem with the municipal water supply. If the entire neighborhood is experiencing low water pressure, there is likely an issue with the water main. In this case, there is little that homeowners can do except wait for the problem to be resolved by the water utility company.
Below are a few possible causes of low water pressure affecting your house.
A clogged Aerator
An aerator is a small screen covering the faucet spout’s end. Its purpose is to be the last filter water passes through before flowing into the sink. Mineral accumulation over time might block the aerator. This is more likely to happen if you have hard water containing a higher concentration of minerals. If your aerator is clogged, it will be difficult for water to flow through. You may notice that your water pressure is lower than usual or has a strange taste or odor. To clean a clogged aerator, remove it from the faucet and soak it in vinegar for a few hours. After that, scrape it with a toothbrush to remove any remaining accumulation.
Cleaning a clogged aerator is very simple. We’ll show you how it works below.
From Denver Water
What You’ll Need
Equipment / Tools
- Channel-lock
- pliersSmall
- screwdriver
- Sewing needle
- Toothbrush
Materials
- Masking tape
- Toothpick or paper clip
- Vinegar
Steps
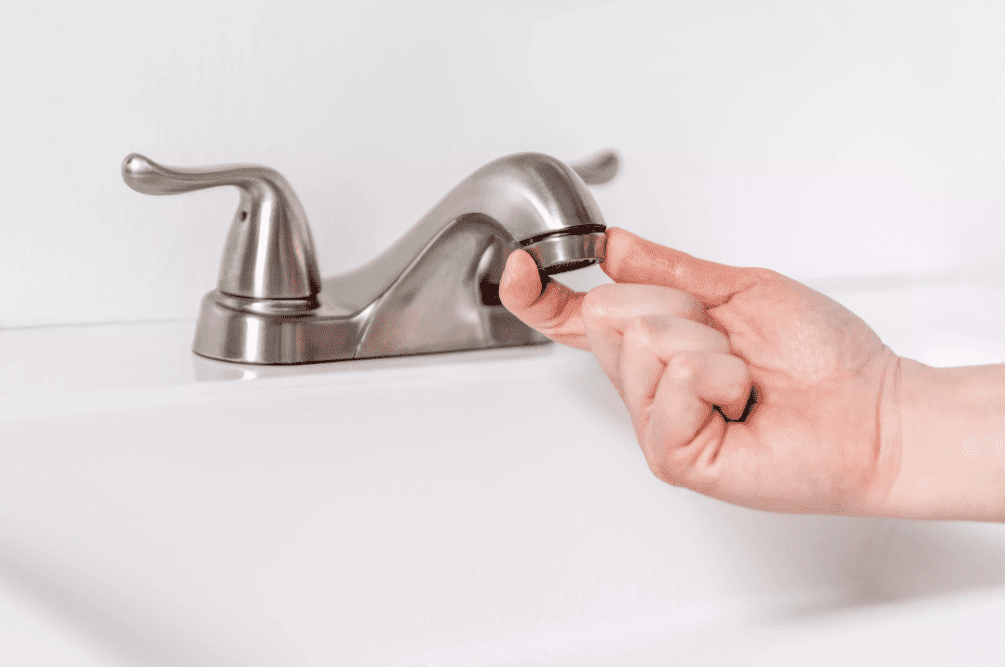
- Remove the Aerator
Cautiously remove the aerator from the faucet using a pair of channel-lock pliers. If the aerator is difficult to remove, wrap masking tape around the pliers’ jaws to avoid scratching the finish on your faucet.
- Check for Deposits and Debris
Use a toothbrush to clean away any deposits or debris clogging the aerator. You may also need a toothpick or paper clip to clear away any stubborn bits of gunk.
- Disassemble and Clean the Parts

Take apart the aerator with a toothpick or a paperclip, noting how the pieces connect. Any big fragments should be washed off. If you discover blocked holes in the screen or other components, use a paper clip or a sewing needle to clear them.
- Soak Parts in Vinegar

Pour vinegar over the aerator and its components, then let it soak for several hours. Rinse the aerator and parts with water after soaking them in a bowl of vinegar for several hours.
- Rinse and Reassemble the Aerator

For a brief period, turn on the faucet to flush out any loose particles. The water may gush and spray from the sink, so be careful. In its original arrangement, assemble the aerator components.
- Reattach the Aerator
Reattach the aerator to the faucet. Hand-tighten it as much as possible before using channel-lock pliers to finish tightening it.
Clogged cartridge
Next, check if your water fixture’s aerator is functioning properly in the cartridge faucet. The cartridge, located at the base of the handle, controls valves that allow water to flow and prevent leaks and malfunctions.
Debris, on the other hand, may also obstruct the cartridge. Mineral deposits from hard water can also accumulate there, making it more challenging to repair a clogged cartridge. Since you’ll need to turn it off, turning off the water supply to the faucet is a little trickier than replacing an aerator. However, it’s simple after that – we’ll go through each step in detail below.

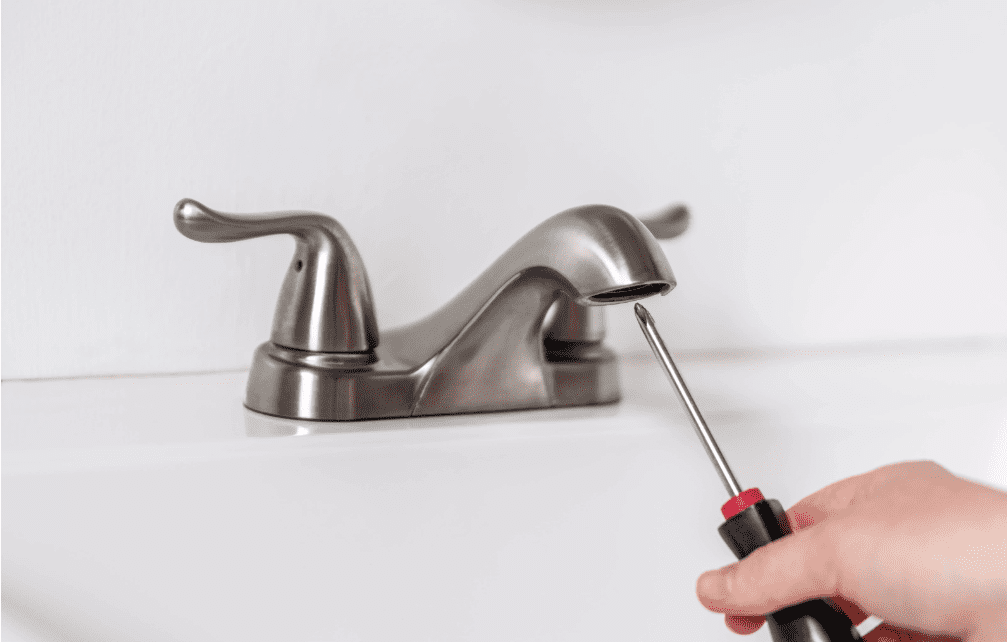
- The cap above the handle must first be unscrewed and taken off. Underneath it, you should be able to see a small screw – use a Phillips screwdriver to remove it. With that out of the way, you can pull out the handle, giving you access to the cartridge.
- Consider looking at your replacement cartridge right now and compare it to the old one – they might look different, but they should be identical in size and shape. If everything checks out, remove the old cartridge by carefully pulling it out of its housing.
- There might be some sediment or buildup around it, which you can clean before putting in the new cartridge – use vinegar, a toothbrush, or an old cloth.
Once everything is clean and dry, please insert the new cartridge to ensure it faces the same direction as the old one. Push it in until you hear or feel it click into place, and then screw back in both screws –the one on top of the handle and ersatz last done earlier. And just like that, your clogged cartridge should be fixed!
A faulty faucet
A kitchen faucet’s aerator and cartridge are not the only possible points of failure. They are simply the most typical areas of difficulty. You’ll probably need to replace the faucet if the problem appears with the faucet, not the aerator or cartridge.
What you need
- Tools
Basin Wrench
Adjustable Wrenches
Bucket
Putty Knife
Rags
- Materials
Bathroom Faucet
Kitchen Faucet
Supply Lines
Silicone Caulk
Remove the Old Faucet
Step 1: Turn Off the Water Supply
Open the faucet to let any lingering water out of the pipes after turning off the water at the valves under your sink.
Step 2: Disconnect the Supply Lines
Next, the old faucet’s supply lines must be disconnected.
Then, remove the lift rod. After that, unscrew the nuts underneath and remove the whole faucet.
Remove the Drain
Step 1: Remove the P-Trap
Keep a pail to hold the water close to you, and then take off the P-trap.
Step 2: Disconnect the Drain:
Unscrew the connection between the tailpiece and the drain.
Step 3: Clean Up Around the Old Drain
If there is any plumber’s putty or sealant around the drain, clean that up as well.
Install the New Faucet
Step 1: Insert the Faucet Through Mounting Holes
Put the plumber’s putty around the base of the new faucet and then insert it through the mounting holes.
Step 2: Install the Rubber Washer and Drain Body.
Tighten the retaining nut by hand, then use a wrench to give it an extra half-turn.
Step 3: Insert the Ball Rod
Put the ball rod through the hole in the drain body, then screw on the washer and cap.
Step 4: Install the sink after assembling the supply lines.
Before installing the sink, attach the supply lines to the faucet shanks. Installing the sink and connecting the water valves follows.
Step 5: Flush the Faucet and Check for Leaks
Before you’re finished, flush the new faucet and check for leaks.
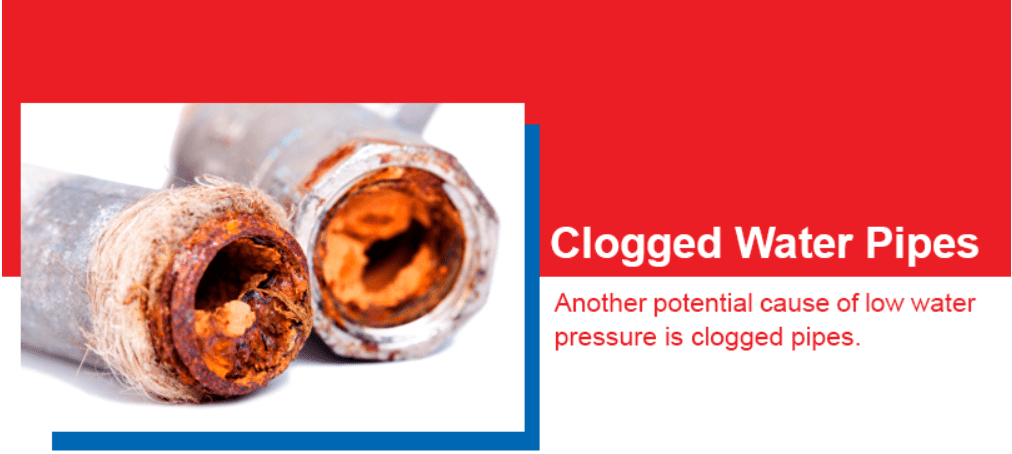
A blocked Supply Line
If the kitchen faucet doesn’t cause the low water pressure problem, a clogged supply line is the next most likely cause. Any home’s pipes and plumbing can easily become clogged with debris, and they can occasionally be quite challenging to deal with, frequently requiring professional assistance.
You can do a few things to try and unblock the pipe on your own. First, check to see any visible debris near the pipe. If there is, try using a plumber’s snake or a plunger to get rid of it.
You may also try pouring hot water down the drain if that doesn’t work. Any debris lodged in the pipe will be helped to loosen by the heat.
If you’ve tried all of these things and are still not getting any results, it’s probably time to call a professional. A plumber can quickly unblock your pipe and restore your water pressure to normal.
Pressure Reducing Valve Problems
One common problem with pressure-reducing valves is that they can become clogged with minerals or debris over time. Low water pressure or no water flow might result from the valve becoming stuck in either the open or closed position.

Another problem with pressure-reducing valves is that the internal spring may break over time. High water pressure may result from the valve remaining open as a result of this. The PRV spring may have broken if your water pressure is suddenly much higher than usual.
If you have any problems with your pressure-reducing valve, you must immediately contact a licensed plumber. Trying to repair or replace the valve yourself could result in further damage to the unit or even serious injury. It is usually better to leave this task to the professionals, as plumbers have the skills and expertise to troubleshoot and repair pressure-reducing valves safely.
The sediment of the Water Heater
Steps
- Turn the Water Heater Off
Switch off the electricity if your water heater is electric. Set your thermostat to “pilot” if your [water heater] is a gas heater like the one in the image above.
- Turn the Cold Water Valve Off
Locate the cold water valve that is feeding your water heater. It is generally located just above the tank. Once you have found it, turn it to the “off” position.
- Let the water cool.
If you have an electric water heater, wait at least 30 minutes or until the water in the tank has cooled completely. If your water heater is gas, give it an hour to cool down.
- To the drain valve on the tank’s side, connect a drain or garden hose.
Locate the drain valve towards the bottom of your water heater. Next, take your hose and firmly attach it to the valve, ensuring it is on tightly. If not, you may experience leaks when draining out all the water inside the tank.
- Put the hose’s tip in a drain or pail.

Now that the hose is attached to the drain valve, you can place the other end in a nearby bucket or sink so the water will have somewhere to go when drained from the tank.
- Turn on a faucet (or two)
Turning on a faucet releases any air pockets inside the water heater tank or pipes. This will make it easier for the water to flow out when you open up the drain valve.

- Turn on the drain valve to begin draining the tank.
Once you turn on the faucet, you can open the drain valve counterclockwise. As the water drains out, you will likely hear gurgling noises. This is entirely normal. Let all the water drain out of the tank until it is empty. It has drained out; close the drain valve.
- Final jobs.
After the water heater tank has emptied the sediment, turn off the drain valve and remove the hose. After this, restart your water heater’s cold water valve and heating elements.
Wrapping up
If you’re experiencing low water pressure in your kitchen sink, I hope the above information and tips will help troubleshoot the issue. But if the problem persists, contacting a licensed plumber for assistance is always best.